admin site - users & permissions
Included Below
About Users & Permissions
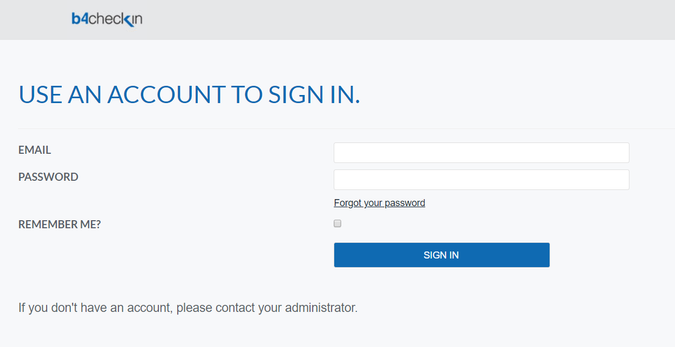
The b4 Admin Site if you are in North America is at
https://gettaroom.b4checkin.com/Admin
If you are located in Europe, the b4 Admin Site is located at
https://euro.b4checkin.com/chameleon/Admin
- Your b4 Project Manager will create the first Property Group SuperUser for your property during Implementation, and will train that individual on how to create and manage Permission Groups and Users.
- Your Property Group SuperUser is able to create additional Property Group SuperUsers in order to share responsibility for managing Permission Groups and Users.
- Property Group SuperUser(s) are able to create custom Permission Groups that include permission to manage users and/or manage permissions.
- Your Property Group SuperUser(s) are responsible to create all Users needing access to the b4 Admin Site, and access to your b4 products.
- For optimum security, each User must be an identifiable team member, with a User record created under their first name, last name and personalized email address that is not shared by a team or department.
- Upon creation of a new User, select the option to send the email to the User. The email they receive will contain a link where the User is able to create their password.
- If the login is forgotten or lost, Users can select "Forgot Password" to receive an email which enables them to change their password.
- Property Group SuperUsers receive an email notifying them of any User who has not logged in for 30, 60 or 90 days, prompting you to de-activate them, as appropriate. You can select 30, 60 or 90 days under Property Settings -> Password Behaviour. These notifications cannot be de-activated.
- To log in, enter your email address and the password you created.
Search Users
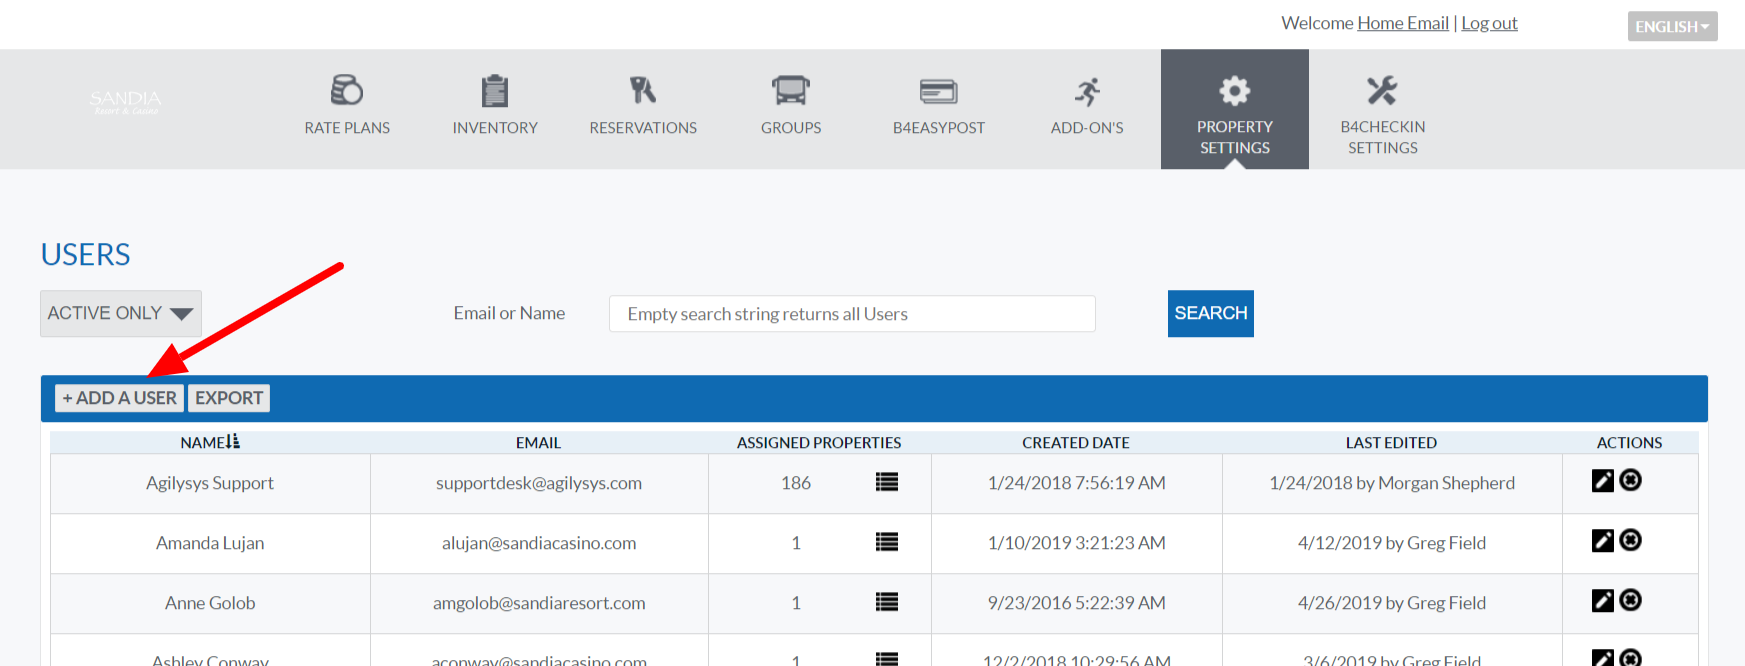
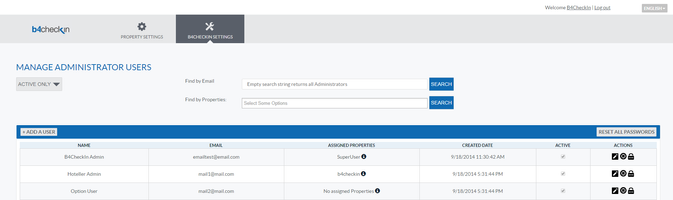
- If you are a Property Group SuperUser, select Property Settings -> Manage Users to access the User page.

- If you have access to only one property, your Users will be listed. If you have access to multiple properties, the User page will include a field where you can select which property you wish to search.
- Enter the email address or name of the user you are looking for, or leave the Email or Name field blank to generate a list of all Users (per property if you have more than one).
- Search results can be sorted by column by selecting the column heading.
- The Assigned Properties column shows the number of properties to which each User has access. The icon next to the property count enables you to see a list of the specific properties to which a User has access.
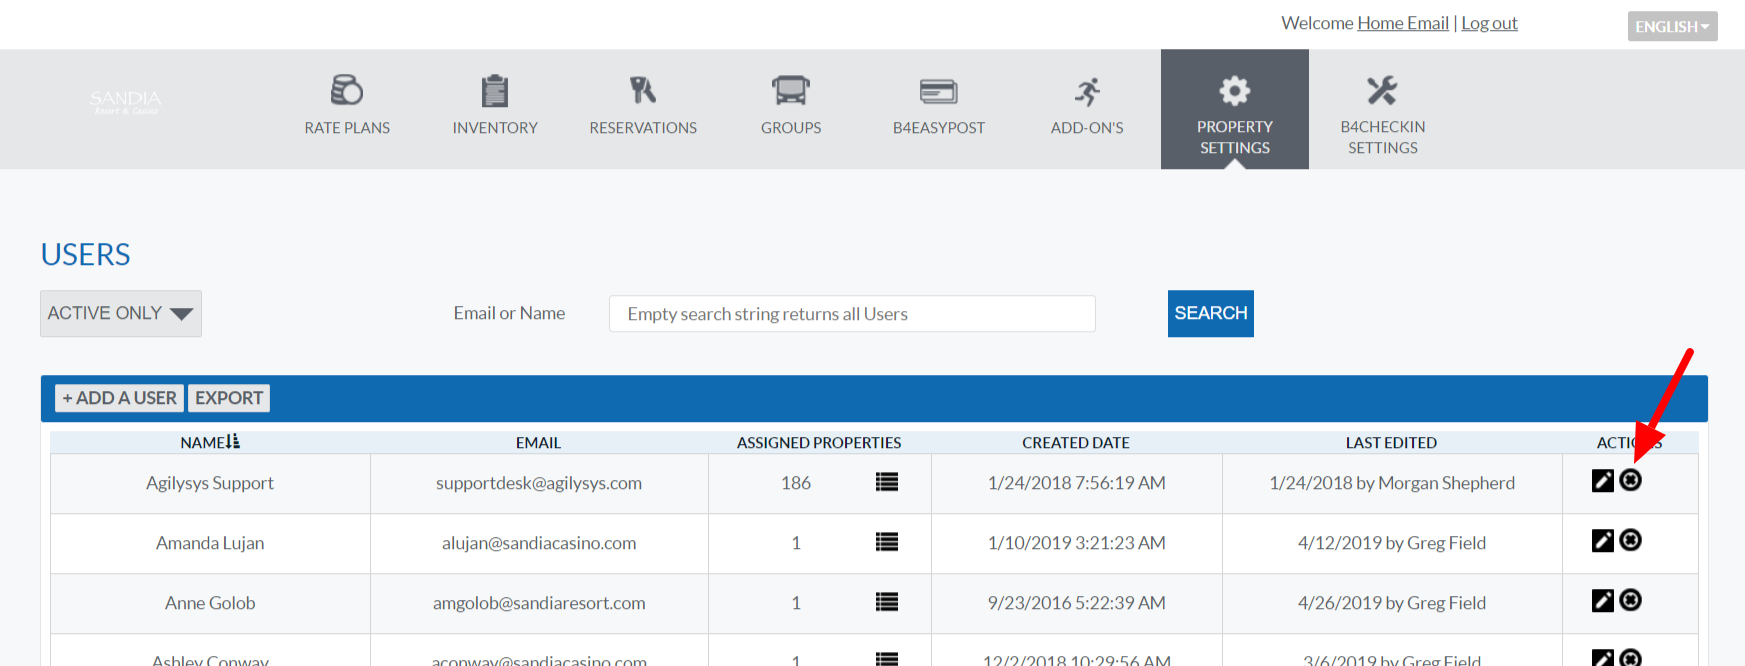
- The pencil icon in the Actions column enables you to Edit a User.
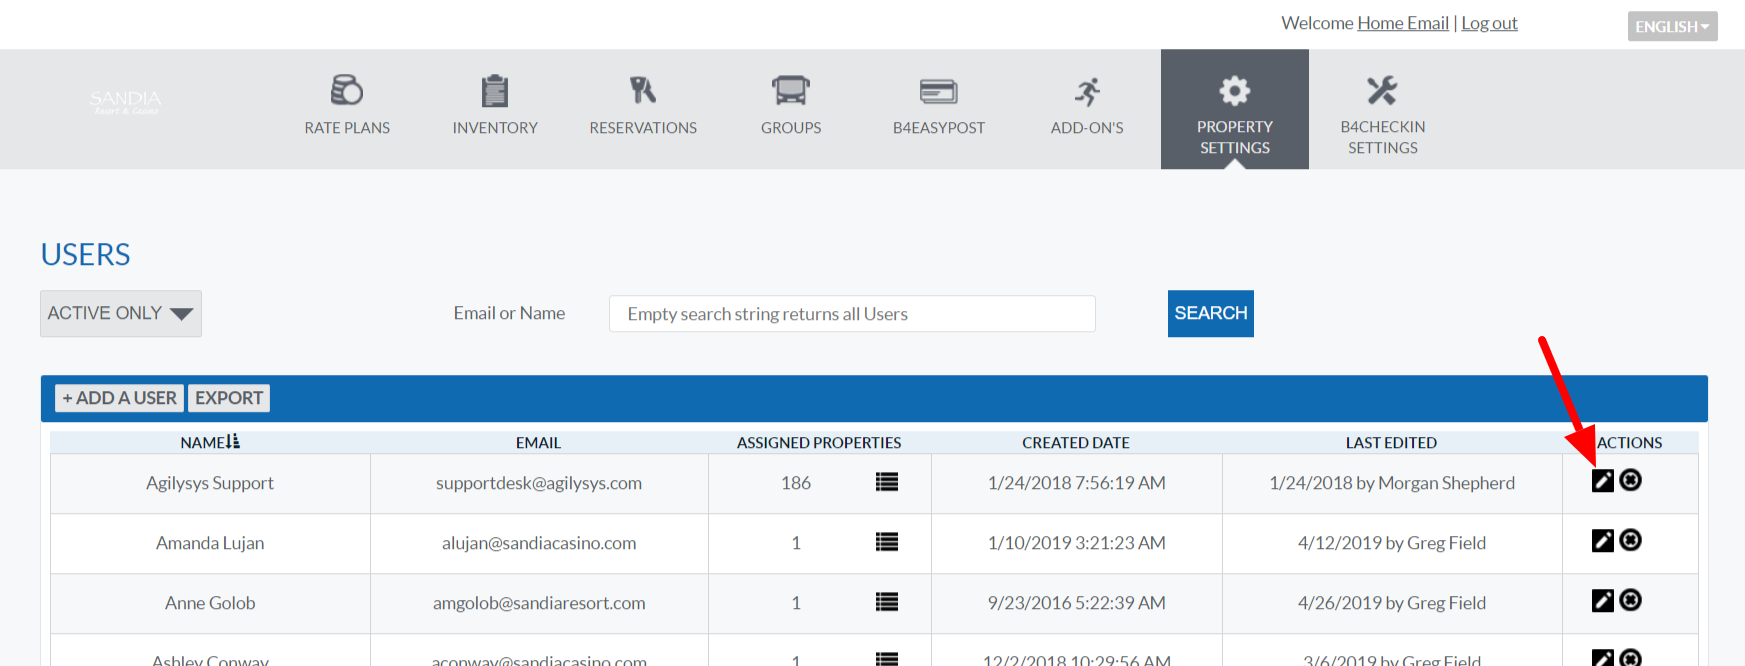
- The X icon in the Actions column enables you to De-Activate a User.
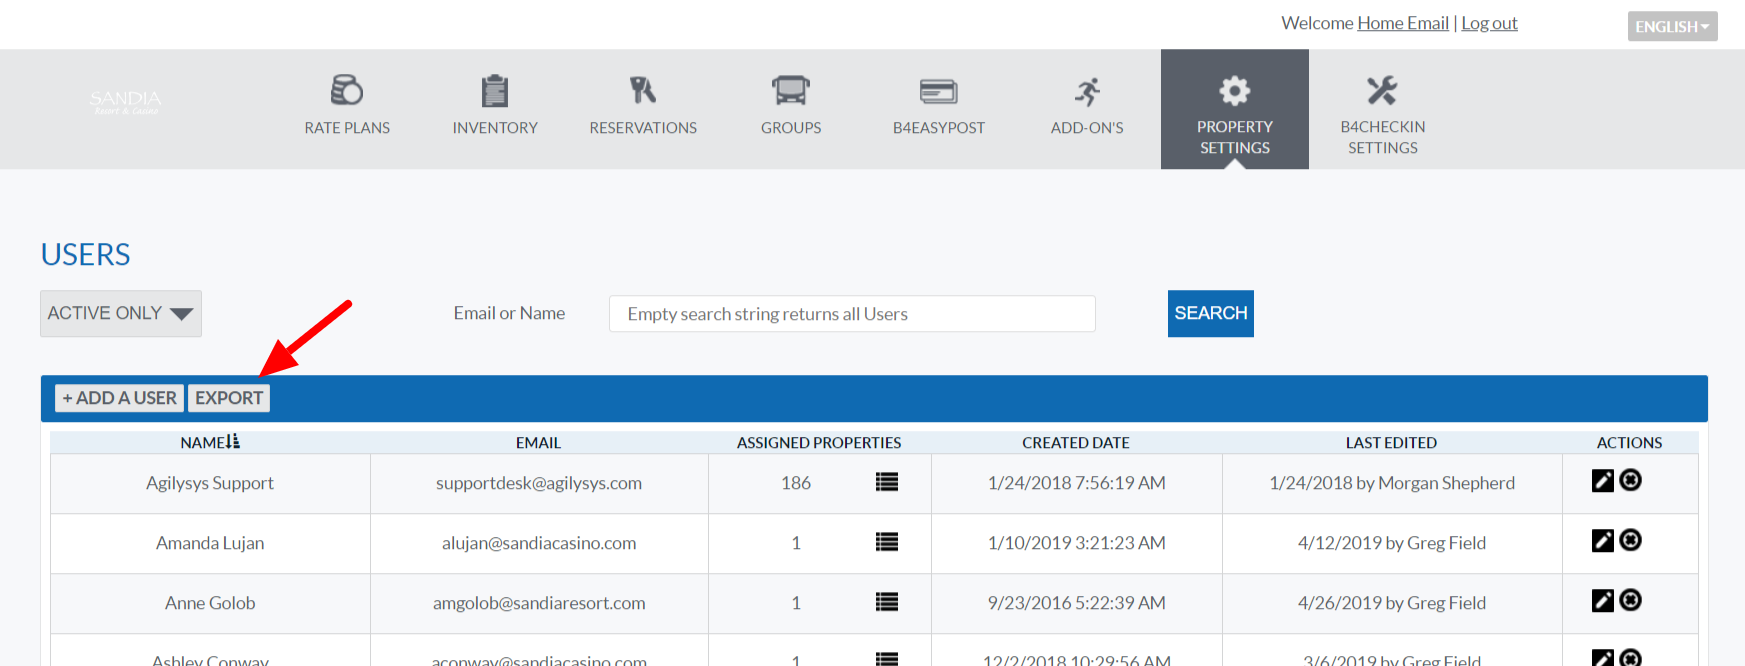
- User lists can also be exported as a CSV file.
View, Create & Edit Permission Groups
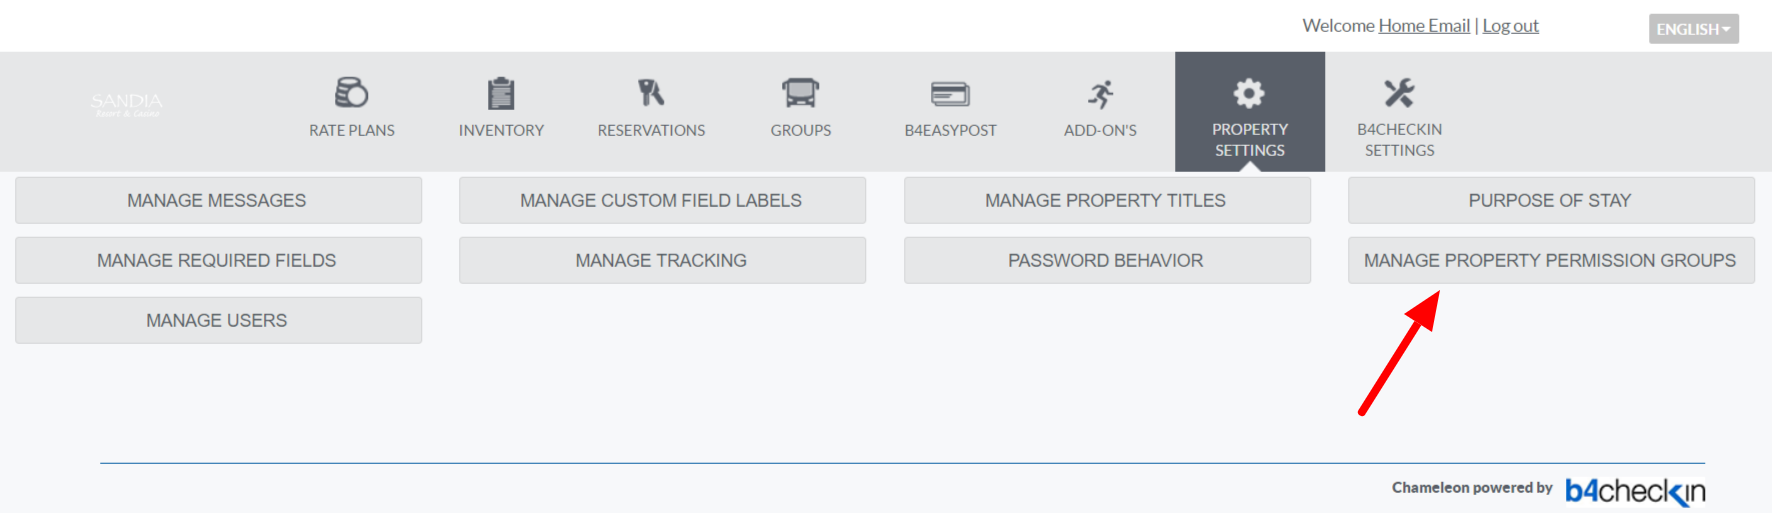
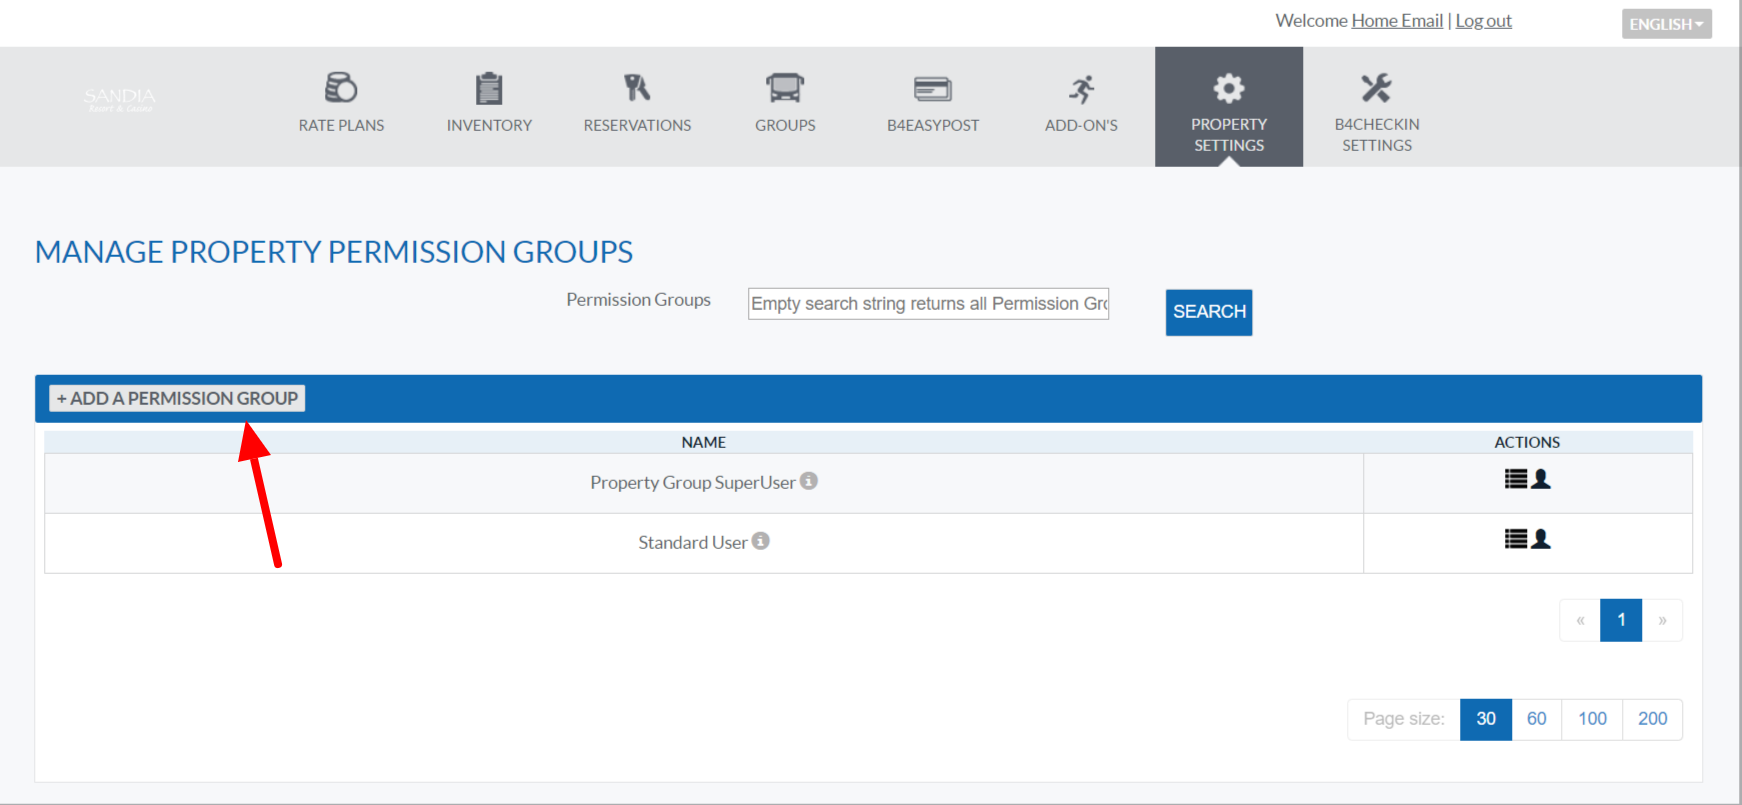
- If you are a Property Group SuperUser, select Property Settings -> Manage Property Permission Groups to access the Permission Group listing.
- 'Property Group Superuser' and 'Standard User' are default Permission Groups that cannot be edited or deleted.
The Property Group SuperUser is able to manage Users and Permissions, and to access all features and settings in your products.
Standard Users have full operating access to all features of your products, but do not have access to User management or to general Property Setup settings. - When you first access the Permission Groups page, the Permission Groups for the property currently selected will load. If you have access to a single property, Permission Groups for that property will load immediately; if you have access to multiple properties, you will need to select a property or group of properties.
- When Permission Groups are listed, icons in the Actions column enable you to Edit, Copy (coming in the next release), View the Members of, or Delete (coming in the next release) each Permission Group.
- To create a new Permission Group with selected access to products or selected access to product features, select 'Add a Permission Group'.
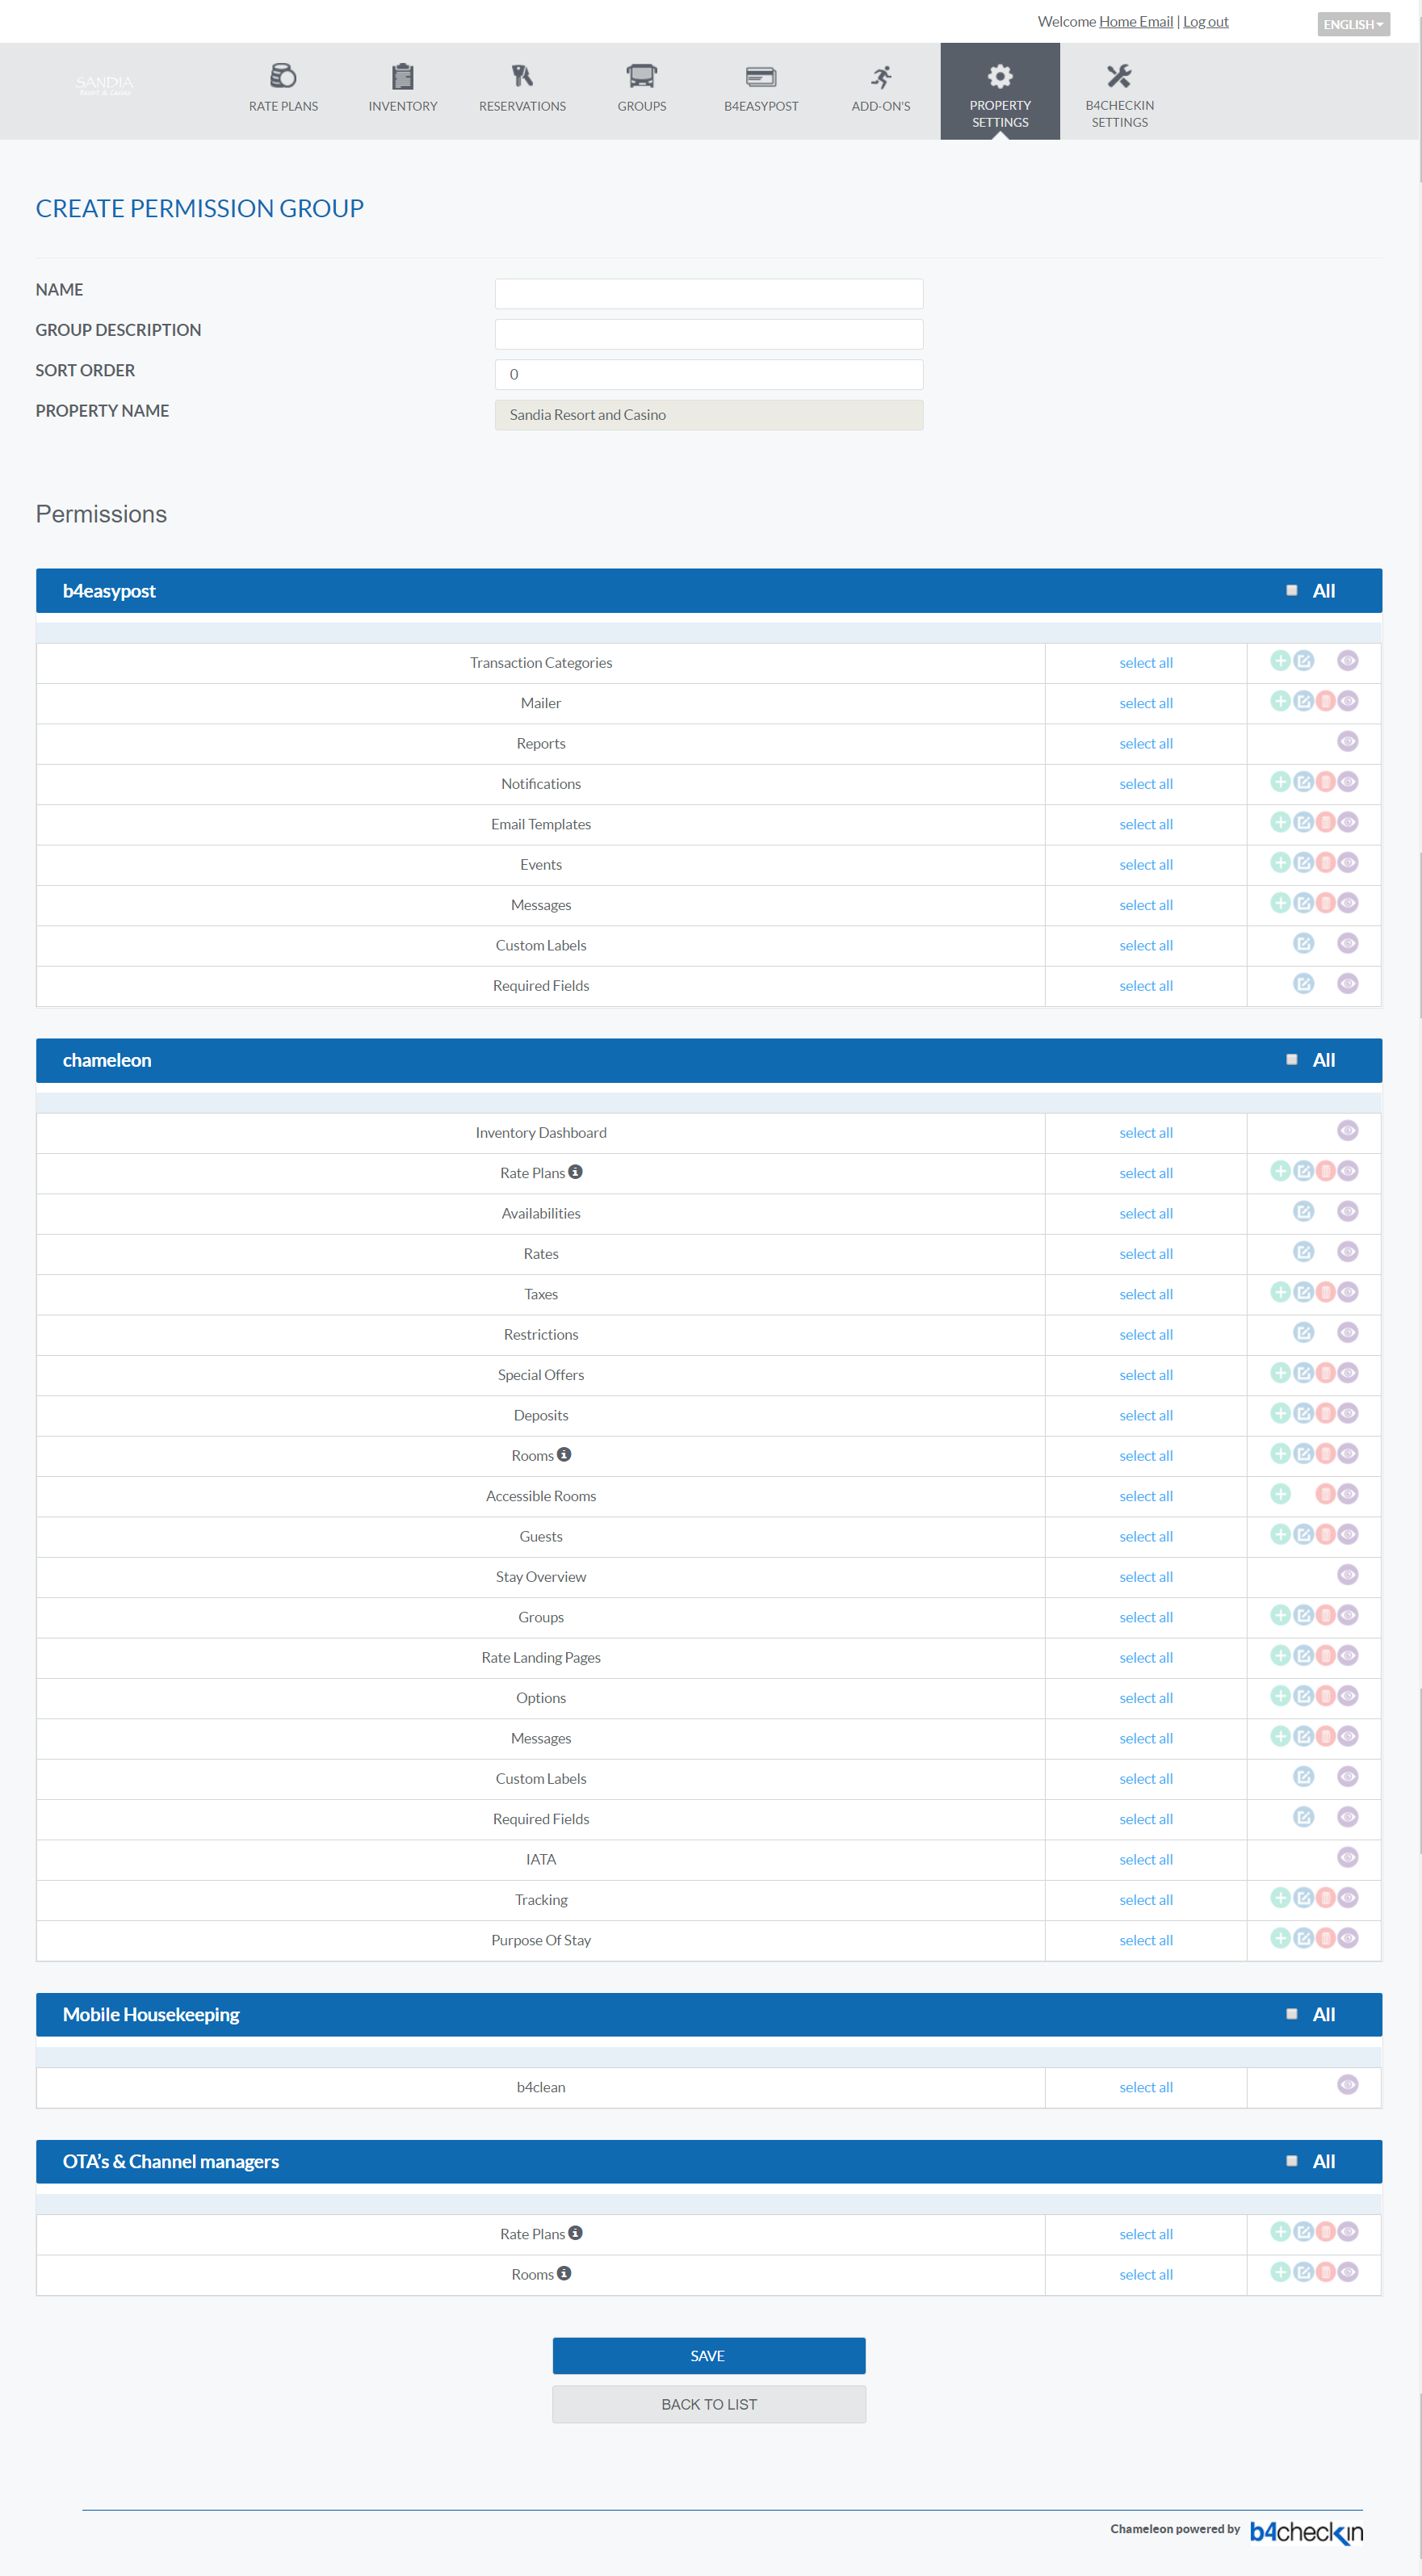
Create a name for the new Permission Group. Choose a name that will sufficiently differentiate one Permission Group from another. Names are normally descriptive of the product(s) accessed and/or positions or departments for which they are created.
If you have access to multiple properties, select which property(s) you want your new Permission Group to exist in using the Property(s) field. If you only have access to one property, the Property(s) field is hidden.
All available Permissions are listed by product. Select which Permissions you want to include in your new Permission Group. You can choose Add, Edit, Delete or View Only for each Permission, or 'select all' on any row to include all four options. If you wish to include full access to any given product, select the check-box in the blue header bar for that product.
Select Save. Your new Permission Group is now available to assign to Users. - To edit a Permission Group, select the Edit icon in the Actions column.
All available Permissions are listed by product, showing those currently selected for the Permission Group you are editing. Make any required changes to those selections. You can choose Add, Edit, Delete or View Only for each Permission, or 'select all' on any row to include all four options. If you wish to include full access to any given product, select the check-box in the blue header bar for that product.
Select Save. Your edited Permission Group is now in effect for Users to which it is assigned.
Create User
- Users can be created by your Property Group SuperUser(s).
- For optimum security, each User must be an identifiable team member, with a User record created under their first name, last name and personalized email address that is not shared by a team or department.
- Specific permissions are assigned to each User during creation.
Upon implementation, two standard Permission Groups are available: Property Group SuperUser and Standard User.
The Property Group SuperUser is able to manage Users and Permissions, and to access all features and settings in your products. Standard Users have full operating access to all features of your products, but do not have access to User management or to general Property Setup settings.
Your Property Group SuperUser is also able to create additional levels of permission if you require different groups of Users to have varied access to product features (see View, Create & Edit Permission Groups in the preceding section, above). - If you are a Property Group SuperUser, select Property Settings -> Manage Users -> +Add a User
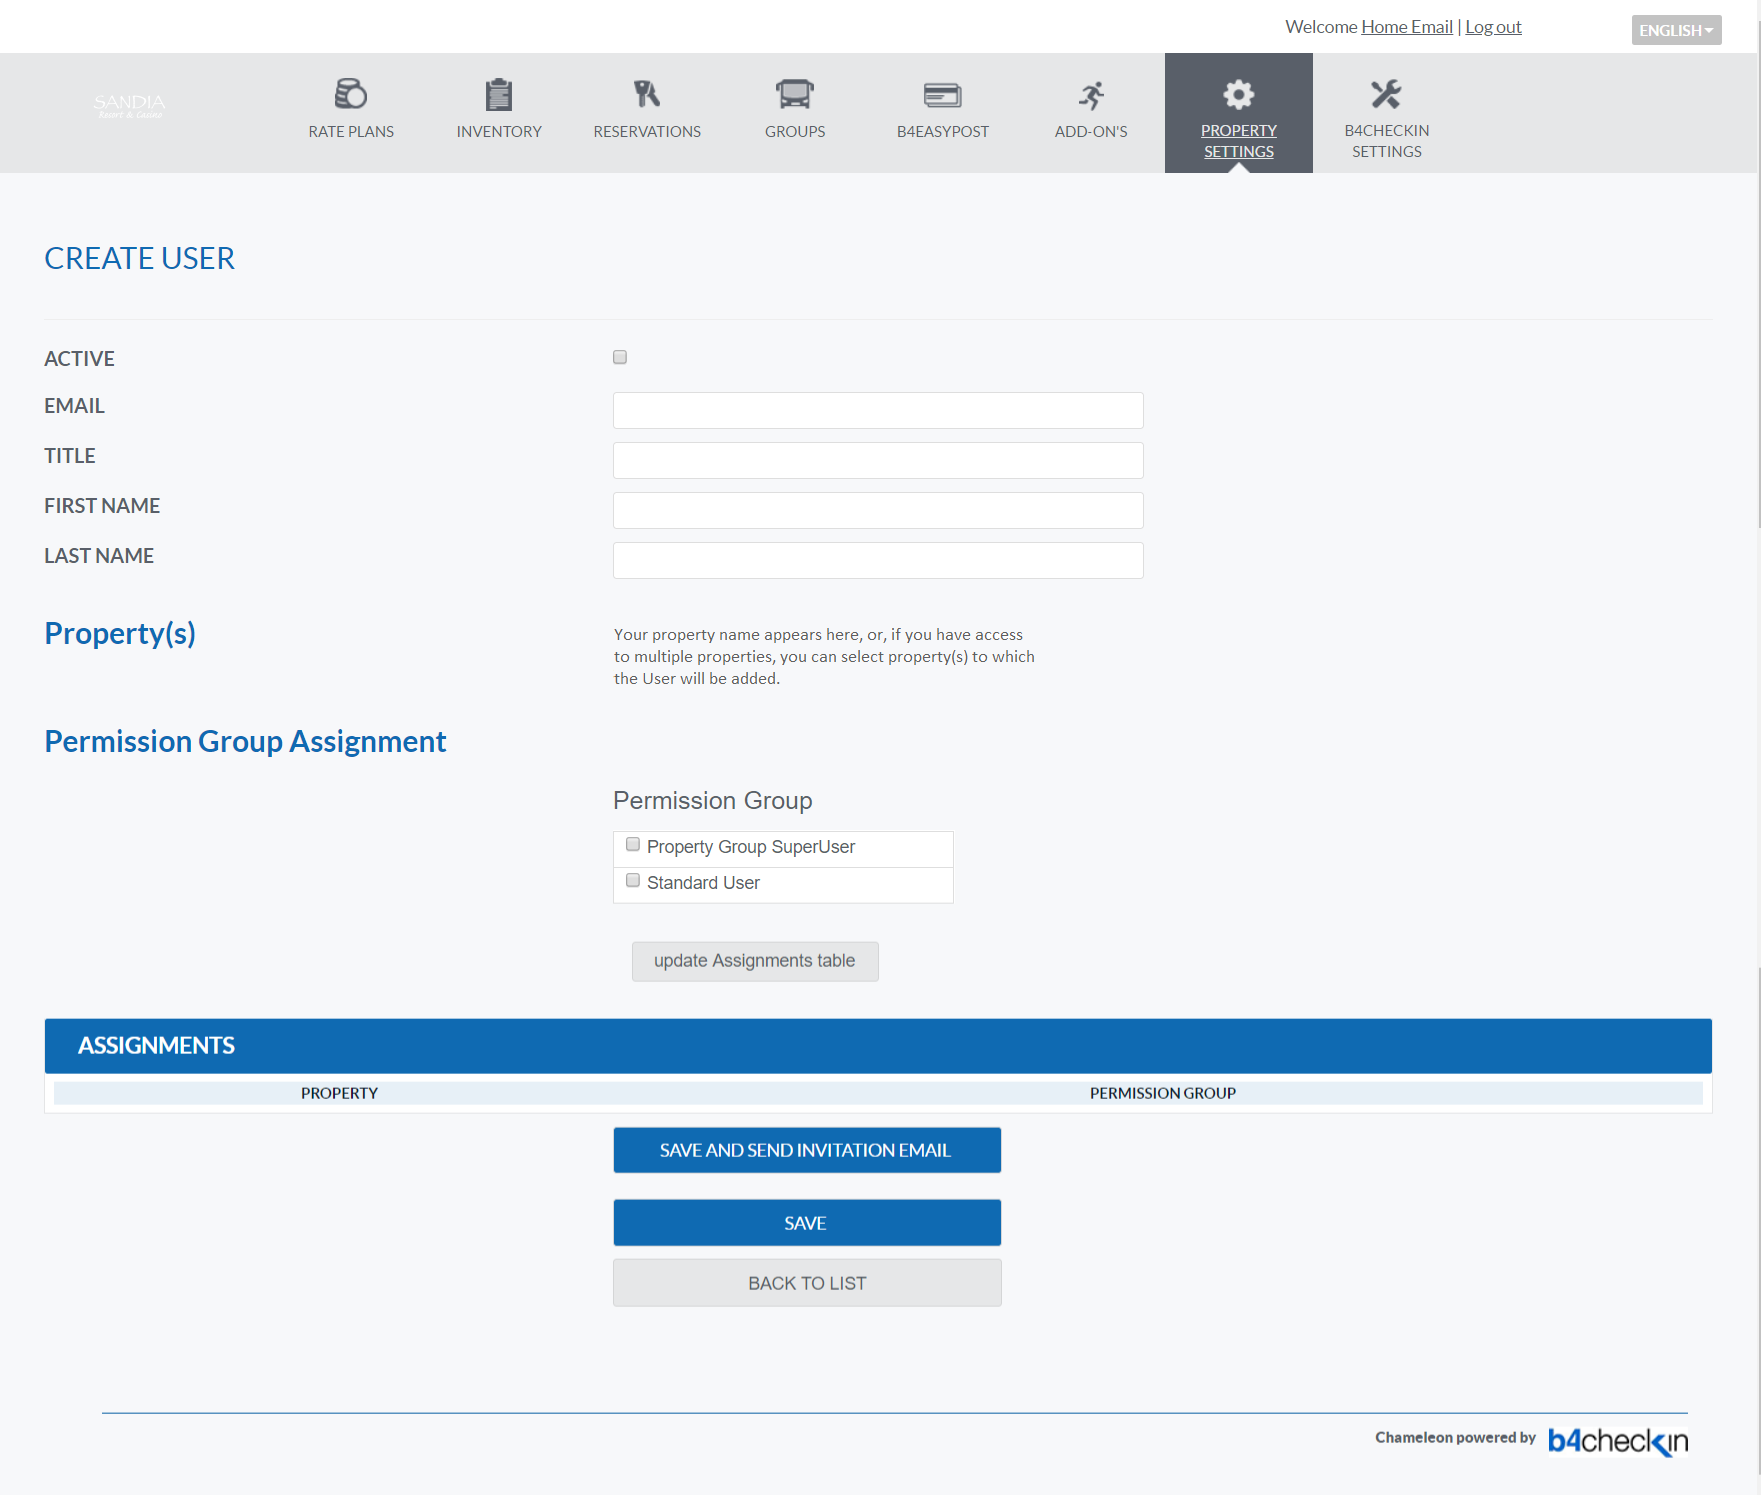
- Turn on the Active check-box, unless you are creating a User that is to be remain Inactive for a period of time.
- Enter the email address of the individual. Do not use an email address that is shared by a team or department.
- Enter the Title (optional), First Name, Last Name.
- If you use the SignNow product, you may enter the SignNow log-in for the individual into the 'Documents' fields, which causes a log-in to the Admin Site to also log the user into SignNow. If you do not use the SignNow product, the Documents fields will not appear.
- If you have access to multiple properties, you must select which properties the User is to created in.
- Select Permission Groups to be applied to the new User. If you are adding the User to multiple properties, you may apply Permission Groups one property at a time. As you add Permission Groups, you can update the summary table using the button labelled "Update Assignments Table".
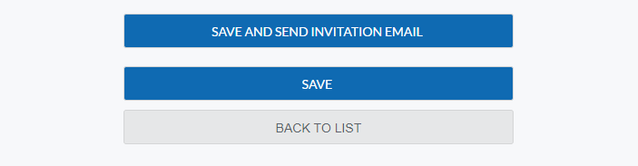
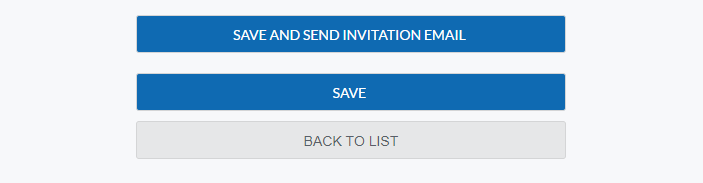
- After assigning Permission Groups (per property, if applicable), you have the option to send the User an invitation email, which prompts the new user to create a password, or to simply Save.
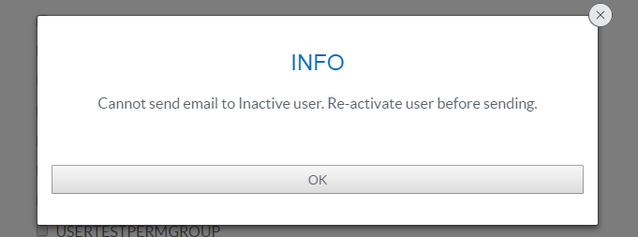
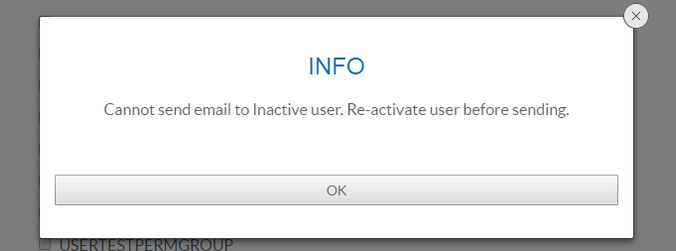
- User Profiles can be Active or Inactive. Trying to trigger a password creation email for an Inactive User generates the following error.
Failure of the Invitation Email to send will trigger the error message "Profile created, but Create Password email failed. Please edit User to trigger New Password email."
Failure of a Password submission will trigger the error message "New Password email triggered, but updating User failed. Please check Profile."
Edit, De-Activate or Delete User
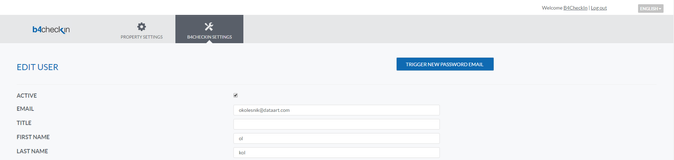
- To change details of a User record, select the pencil-shaped Edit icon in the Actions column of any User list. Any detail recorded when setting up the User can be edited.
- If you are editing the record because the Password needs to be changed, select the 'Trigger New Password Email' button. This sends an email to the User, enabling them to change their Password. See the section 'Create or Change Password' below.
- To de-activate a User, select the 'x' icon in the Actions column of a User list, or select Edit, and then un-check the 'Active' check-box in the Edit User screen.
Invitation Email
When your SuperUser creates a new User and sends an Invitation Email, the User receives an email containing a link to create a password.

If the password creation link is incorrect or expired, a pop-up is triggered with the error "Link incorrect or expired. Please submit a new "Forgot Password" request to obtain a new link."
Create or Change Password
- When creating a new User, select 'Save and Send Invitational Email', which triggers an email to the User from which they are able to create their password.
- To enable an existing User to change their password, search for the User, select the pencil-shaped Edit icon in the Actions column, and then select the button labelled 'Trigger New Password Email'. This will send an email to the User from which they are able to create a new password.
- A valid password must be longer than 8 characters, shorter than 20 characters, and must include specific complexities.
- at least one lower case letter
- at least one upper case letter
- at least one digit
- at least one special character, such as any of the following !@#$%^&*()-=+
Passwords which do not meet requirements trigger the message Your password is weak, and will not be accepted.
Passwords which meet length requirements but do not have all 4 complexity levels trigger the message Your password is ok, and will be accepted.
Passwords which meet all requirements trigger the message Your password is strong, and will be accepted.
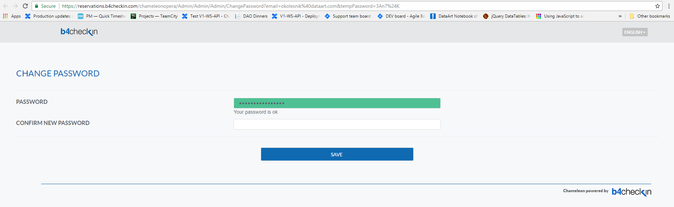
If setting the password fails, an error appears reading, An error occurred when saving. Please try once again, or contact Support for assistance.
Edit Profile
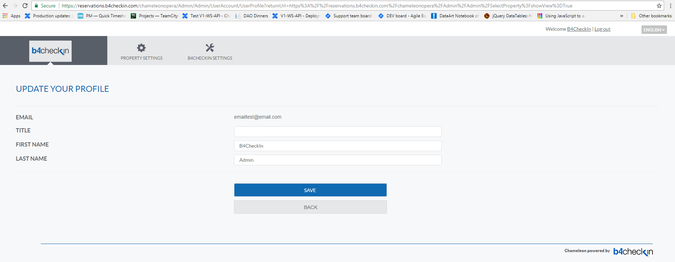
When logged in, you can access your User profile by selecting Edit Profile under your name in the upper right corner of the header panel.
Users can only update the Title, First Name or Last Name of the User profile. The User cannot change the email address.
![]()
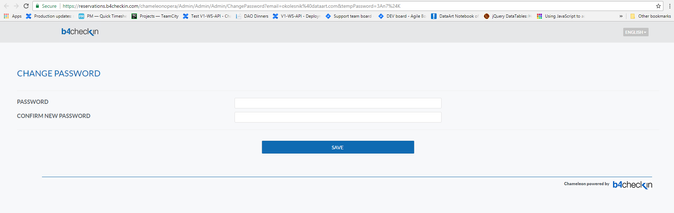
Forgot Password
A User can set a new password by selecting Forgot Password.
This triggers an email to the User, which contains a link to the Change Password page.
Trigger Change Password
SuperUsers can trigger an email requiring a User to change their password through "MANAGE USERS".

Edit the User, and select the 'Trigger New Password Email' button.
Your SuperUser is able to update fields on the User record as needed, and can then select "Save and Send Invitation Email".
If your SuperUser tries to update or send an email to an Inactive User an error pop-up appears.
Failure of Invitation Email to send triggers "Error occurred when sending Change Password email.."
Failure of password submission triggers "New Password email triggered, but updating User failed. Please check Profile."
Copy Permission Group
Any custom Permission Group you have created can be copied, in order to create a similar Permission Group. Use the Copy icon and then give the new Permission Group a different name that does not already exist. You can then edit the copy in order to make adjustments to what the new Permission Group can access.
Delete Permission Group
Any custom Permission Group you have created can be deleted. If you try to delete a custom Permission Group, the system will let you know if User are currently assigned to that group, and will require you to select different Permission Group for each of those Users. To begin the deletion process, select the trash-can icon under Actions.
Mass Password Change
Only b4 SuperUsers can trigger "RESET ALL PASSWORDS", located on the right-hand end of the blue User table header bar.
If you suffer any security incident after which you feel you would like all User to have to reset their passwords, please contact Support at b4 to request that Reset All Passwords be executed for your property.
When "Reset All Passwords" is activated, a warning appears.

Selecting OK will trigger a mass change of all passwords, requiring all Users to create a new password next time they log in. This measure is recommended following any network security breach.
Password Validation Requirements
Web.config Values for password validation are as follows. These are not configurable per property.
PasswordMinLength - The minimum required password length = 8
PasswordMaxLength - The maximum required password length = 20
PasswordExpire - Determines if password auto-expire = TRUE
PasswordExpireDays - Number of days after which the user's password expires = 90
ChangePasswordLinkLifetime - Number of minutes a link to change a password will remain valid = 30
PasswordComplexityScore - used for password requirements = 3 of possible 4
IncorrectPasswordBlockTime - The number of minutes a user is locked out after exceeding incorrect login attempts = 10
PasswordChangeEmailFrom - The FROM email for new password email = users@b4checkin.com
The following controls are configurable per property, and are located in Property Settings -> Password Behavior.
UniquePasswordNumber - A new password cannot match this number of most recently used passwords = default 4
IncorrectPasswordAttempts - Permitted number of incorrect login attempts before lock out = default 5
DaysInactivityForNotifications - Can be 30, 60 or 90 = default 60
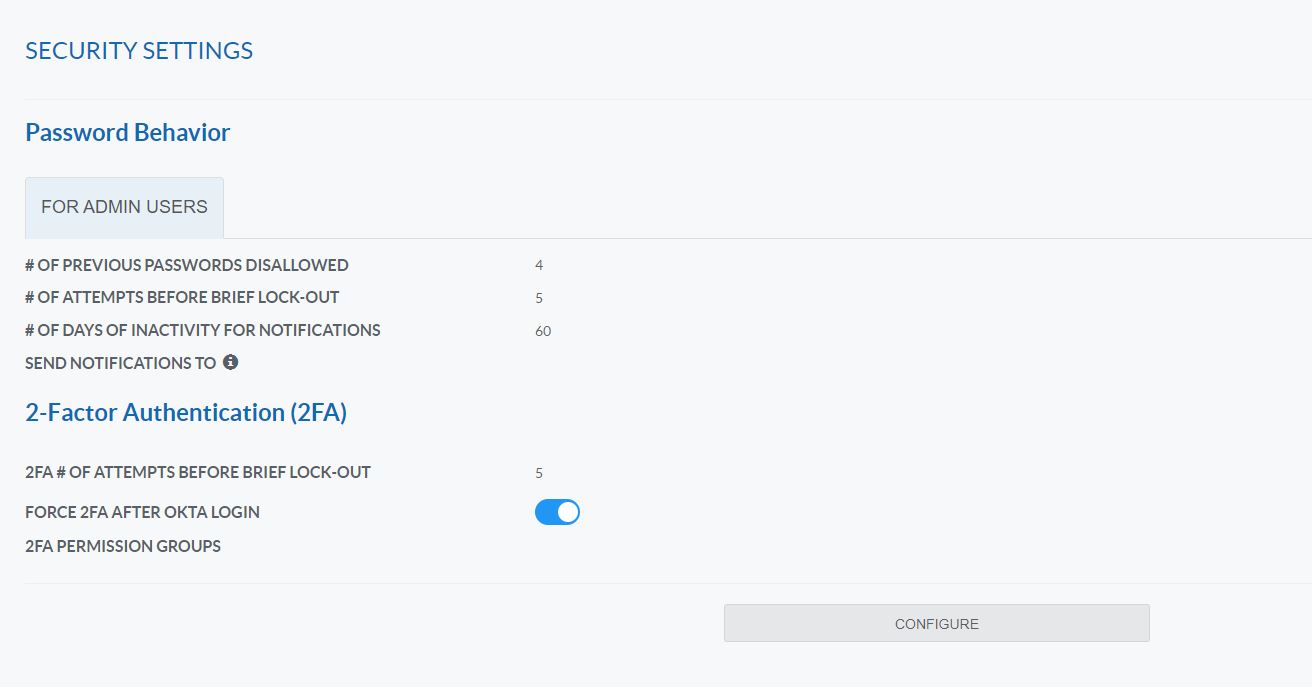
2 Factor Authorization (2FA) set up
2 Factor Authorization adds another layer of security to your user access.
In order to make 2FA active, you must turn on this feature in b4 Admin under Property Settings and "Security Settings".
Click on the Configure button to open settings:
Select the Permission Group you would like to add this security feature to:
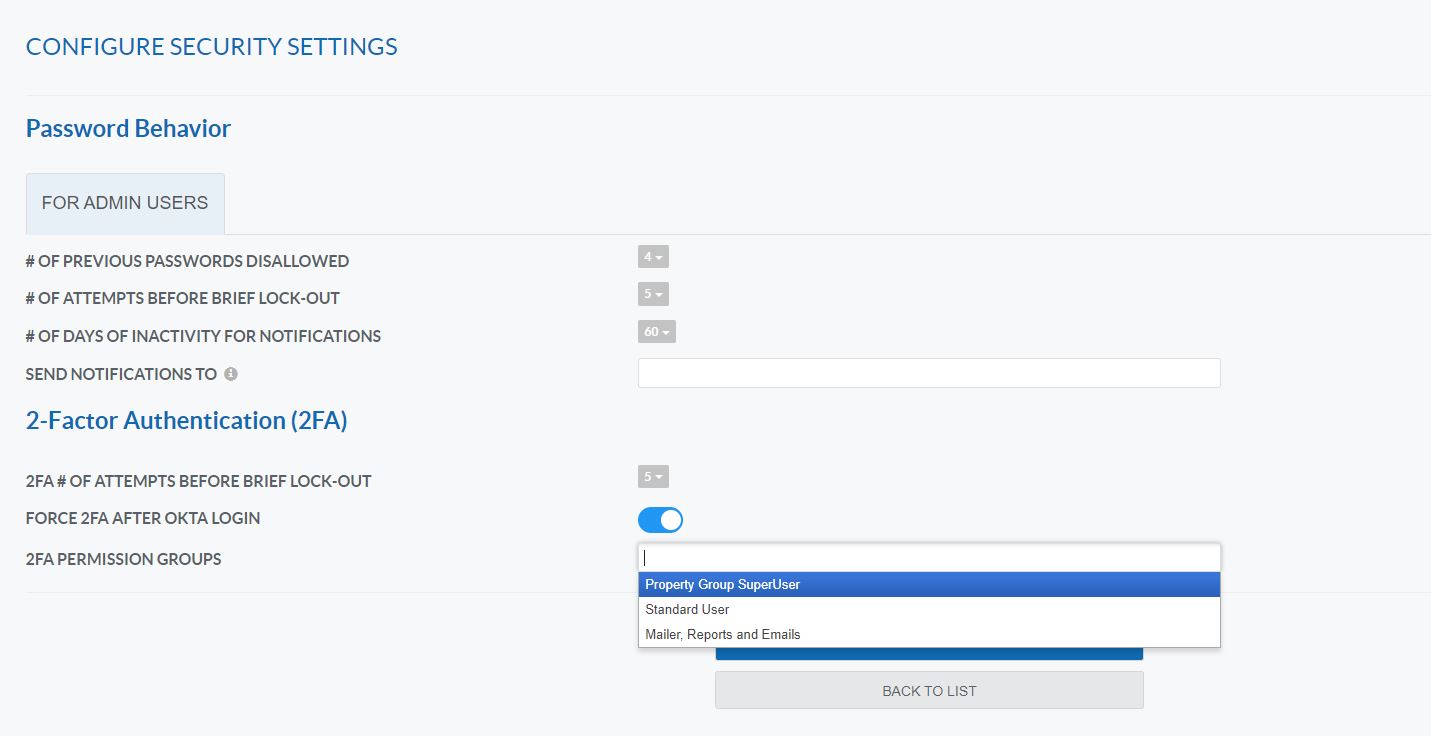
Once the permission groups are selected, hit save.
When a user logs into Admin with those designated permission groups, they will be prompted to add a 2FA authenticator app to create their access codes. This authenticator will be needed each time the user logs into Admin.
© 2024 b4checkin